Seams Sew Easy Seaglass Seam Guide Lori Holt of Bee in My Bonnet

I'm so excited to show you
a brand new product that
I have designed just for you!
It's a seam guide that you adhere
(temporarily of course)
to your sewing machine bed.

Introducing the
I designed it and …
produced it for me…and you!
I've been waiting
a long time
for them to be ready
and I'm so happy that
they are finally here
and that I can
share them with you
on this weeks
Farm Girl Friday:)
This is only one of the colors available...

It comes in these 4 happy colors
to match your mood or each of your machines:)
GREEN RED AQUA PINK
Personally I plan on keeping one
with all of my machines
and in my sewing bag
so that I am never without one.

Each one comes with 4 of the
1" round Stick-it's…
which are removable double side tape dots.

So now I'm going to
explain why and how to use my
while I'm showing you the
3 easy steps to set it up!

I have put the steps directly onto my seam guide for you.
First step is placing the needle into the dot.
This step is to ensure that
the center line on the
Seams Sew Easy lines up
perfectly with the needle.
With these directions you are
custom fitting it to your machine.
****NOTE****
It's now 6 years later from when I originally did this post introducing my Seams Sew Easy.
It's now 2020!
Now they come with the rectangle already cut out and all you have to do is line up the center line on the guide with your needle.
Easy Peasy!
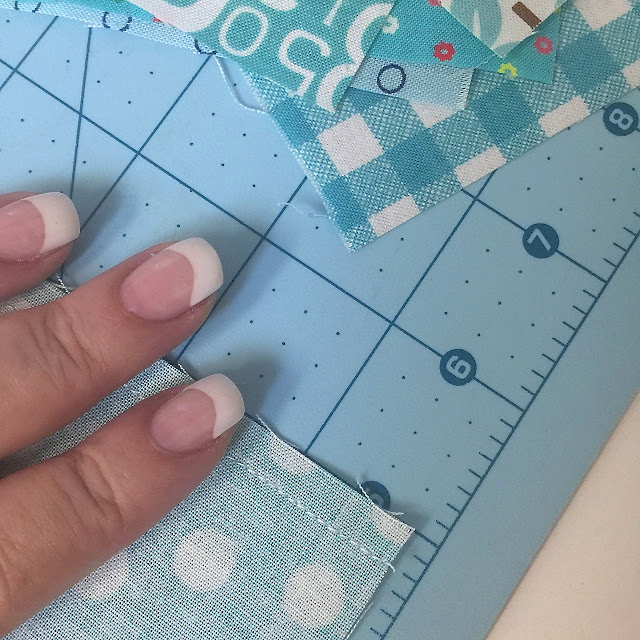
You can make sure it is going straight by using the lines on your machine and the grid lines on the Seams Sew Easy Guide:)
********************************

Un-thread your machine…
align needle with dot and
insert the needle right into the center.

Then lift your needle and remove
seam guide from your machine bed.
Step one done!

Now for step two…
cutting.
See the dotted lines around the rectangle?
That's your guide for cutting out.
Don't worry if you
go off the dotted lines …
they are just there as a guide.
Your Seams Sew Easy will
still work fine even if
it's not an exact rectangle cut out …
the most important thing is
the needle placement within it
and you've already done that!
***IMPORTANT***
Use some good sharp scissors…
or an X-Acto Knife
but NOT your fabric scissors!

Remember the reason that there is a rectangle there in the first place is so that you have your needle placement as a guide when adhering to your machine bed for correct placement of the three lines that will guide your sewing:)
Your machine can't sew fabric with the rectangle in place…so obviously it will need to be removed after sticking your seam guide to your sewing machine bed:)

The large punched hole is there so that
you can use it to start your first cut.
It's sturdy plastic so
it will take more time than just simply cutting paper…
but no worries!
Just start cutting towards
the back of the rectangle like this.
Just use the tip of your
very sharp scissors and
go a little at time for
cutting the sturdy plastic:)

The plastic is sturdy so that it will stick out and lie flat on those sewing machines that have a curved bed or not much space between the front edge of the bed and the needle like for instance my featherweight.
It is SO HELPFUL to have a larger working space on an otherwise short bed.
I purposely designed my Seams Sew Easy guide
with sturdy plastic to stick out a couple of inches on your machine when it's not flat in a table for this very reason:)
You can sew in this photo
that using "washi tape"
also works really well
to hold your Seams Sew Easy in place.
Washi tape is like cute miniature painters tape and can be found in the scrapbooking section of any craft store:)
You can use this instead of the sticky dots that it comes with.

After you have the top piece of
the rectangle out…
simply cut down the sides
until it's all cut out …
like this.
I am using the word "cutting"
but keep in mind that it's really
just clipping a little at a time
with the very tip of sharp scissors.

Now put the seam guide back onto
your machine bed!
Use the lines on your machine …
and the lines on the guide…
to make sure it is straight...

And adhere into place.
I put a dot under 4 of the petals.
(it probably would be just as secure with 2)
I have a front loading bobbin on my machine
so I don't really ever need to
remove my seam guide for changing bobbins.
When my machine needs
to be cleaned or moved etc …
I just pull off the seam guide
and stick it back on afterwards!
Depending on your machine
and how you use it washi tape or
stick it dots will work either way...
Easy Peasy!

Now it's time to remove the rectangle
after your
Seams Sew Easy is adhered.
Because you used the rectangle
and had the needle inserted
so that it wouldn't move …
your lines on the guide
(centered with needle and 1/4")
are exactly where
they need to be
for accurate piecing!
After you use it for a while you get to know where to place it pretty easily!

Now I have a cute little flower
with lines to guide my stitching and I know that the center line is lined up with my needle…
YAY!

No more tracing lines onto squares
for easy corner triangles…
flying geese…snowballs etc:)

You simply start stitching on one corner
and let the bottom corner line up
with the CENTER line as you are sewing.
This center line is aligned perfectly
with your needle so it works accurately every time!

Just like this!

I love it!!!

I have always used a guide for
sewing accurate 1/4" seams as well.
I like to know where my seam is
long before I get to the foot.
I find if you wait until you
get to the foot to adjust to 1/4" it can cause
"wobbly" seams…
and that not good for accurate blocks:)
I use the left of the center line
as well and the grid lines on the
center of the flower for
things like hemming etc.
See? Perfect 1/4" seam…YaY!!!

You all should know by now that
I use my Easy Corner Triangle Method
on any of my blocks that have angles at all
(which is most of them)
So I'm hoping that you will love
my Seams Sew Easy as much as I do!
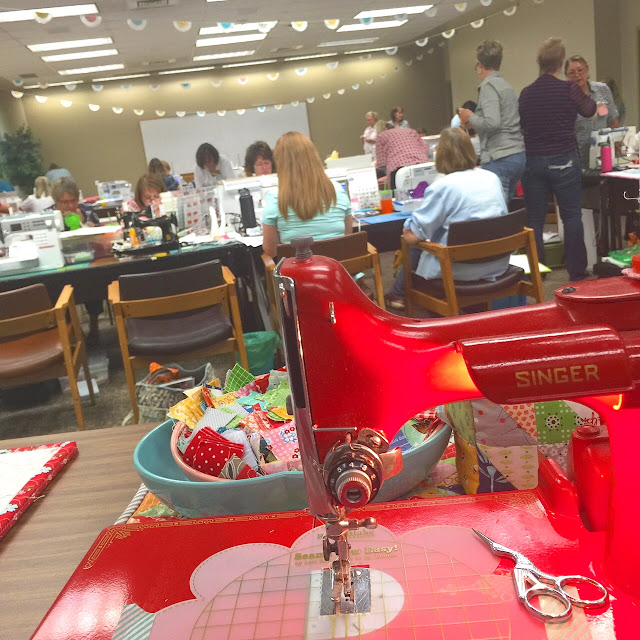
If you follow me on
have attended one of my
Farm Girl Vintage Workshop/Retreats ...
you know I have been using one
on my featherweight.
Seams need to be accurate on retreat too!

Okay…so now onto our first block this week…
"Scrappy Maple Leaf "

You will find the pattern and instructions
on page 58 of my book

I love making maple leaf blocks!
I just had to make a bunch in both the 6" and 12" sizes...

For a swirly twirly falling leaves quilt:)
I used the Picnic Quilt setting
on page 114 of my book.
I'm in the fall mood …
so I'm really looking forward
to seeing all of your blocks!
Don't forget to use the hashtag;
#ScrappyMapleLeafBlock

Now let's talk about my
Scrappy Strawberry block:)
You can find the pattern and instructions on page 59.
I know strawberries are typically
in season during the spring
but I love to decorate with strawberries
so they are always in season at my little cottage!

When you make your blocks…
don't forget to use the hashtag
#ScrappyStrawberryBlock
I think my scrappy strawberry looks great in red too...

So I stitched up a couple of the 12" blocks
and cut 18 - 4 1/2" scrappy aqua squares...

and pieced together a quick table runner:)
12" x 48"

I didn't get time to quilt it for you but you
get the idea…right?
I think I'll bind it in aqua too:)
I like the size of this one…
it will look nice on the main countertop
in my cottagey kitchen:)

to see this weeks guest bloggers
and to view the schedule.
That's it for now!
Now go sew your blocks:)
xx
Lori
Source: https://beeinmybonnetco.blogspot.com/2015/08/seams-sew-easy-is-here-and-farm-girl.html
0 Response to "Seams Sew Easy Seaglass Seam Guide Lori Holt of Bee in My Bonnet"
Post a Comment